When I started baking bread I
was frazzled by all the steps involved. All of the books I read on
the subject described a 12-step procedure. The steps broke down the
procedure into tiny fragments that made the whole process seem
over-complicated. The process is great for explaining everything in
graphic detail, but for casual bakers, it's unnecessary to go through
the entire process so intricately.
Nowadays I take a simpler route for
the whole process. The best way for me to explain it is in a 10-step
process; measuring the ingredients, mixing the ingredients, kneading
the dough, the first rise (proofing), diving the dough, shaping and
panning the dough, the second rise, baking the dough, cooling the
bread, and storing it. This process works very well for any simple
breads. There are a few more steps that have to be added for certain
breads, but I'll explain these later.
I'm going to go into detail on each
of the steps. I mainly want to outline the dos and don'ts of it all,
in hopes of saving you the despair of failed baking attempts.
Step 1) Measuring
First and foremost, you need to pay
attention. This is especially important when you're measuring your
ingredients. There's nothing worse than ending up with a finished
bread that's too salty, or too sweet etc. Not only is the flavour
gross, but the bread's texture will be ruined as well. Bread making
is a strange balance of a craft and a science experiment. Because of
this, you have to start off following the recipe's measurements, and
then adjust based on feel.
There are two common ways to
accomplish measuring the ingredients for your dough. In my posts,
I'll try to outline both of them. First is by weighing. This is the
method I usually use. It guarantees the same results every time.
It's a fact that the weight of flour changes based on the humidity
around it. Not to mention that salt, for example, varies based on
the type of salt it is (sea salt is less dense than table salt!).
See my post on equipment for more info on scales.
The second method is using measuring
cups. This is good for a couple of loaves' worth of dough, but not
so much for larger batches. When measuring your flour, give the full
cup a few good taps on the counter to settle it. This will help keep
your measurements consistent every time.
As a side note, whichever method you
use, feel free to use a measuring cup for your water and oil. The
difference in their weight and measure are negligible.
Note: Temperature – As a footnote
to measuring ingredients, I wanted to mention water temperature. You
need to use warm water in your dough. It's the only way to make sure
your dough is a good temperature for yeast growth. But be careful.
If you use water that's too hot you can accidentally kill the yeast.
If the water is cold, you'll be waiting a long time for your dough to
rise. My rule of thumb is simple. Run your tap on lukewarm.
Gradually increase the temperature of the water until it just starts
to feel uncomfortable to the touch. At this point the water should
be warm, but not too warm for the yeast.

Step 2) Mixing
Mixing is straightforward. It's a
matter of making sure all of your ingredients are incorporated into
the dough. Here's the catch. Mixing can make or break the bread.
The ingredients have to be combined in the right way. The second
issue is know what to do with the type of yeast you use.
First of all, there's three kinds of
yeast; active dry, instant, and fresh. See my post on ingredients
for more in-depth info on these. For now, just remember that instant
and fresh yeast have to be mixed into your flour, while active dry
yeast has to sit in the water for a few minutes to bloom. Your first
step should be combining the yeast in the proper way. Your yeast
type will dictate the rest of your mixing procedure.
For active dry, you now have water
and yeast in your mixing bowl. The big mistake here would be to add
salt to your water now. If the salt and yeast come in direct
contact, kiss your yeast goodbye. You'll never get a good rise out
of bread this way. If you like, however, you can add some, or all,
of your sugar can be added to the yeast and water mixture. Sugar is
food for the yeast, and if you combine them, the yeast will bloom
faster. It will bloom without the sugar, so it's your call. Once
the yeast is bloomed, add the flour. Then add the salt (and sugar).
With instant and fresh yeast, you
have flour and yeast in your mixing bowl. To this, you next have to
add your salt and sugar. Just toss it in for instant yeast. Because
it's dry, contact with salt isn't an issue. However, with the moist
fresh yeast, you should take care to bury the yeast in the flour
first, then add your salt. Then add the water to the mix. Another
method is to dissolve the salt and sugar in the water, and then mix
that with the yeast and flour mixture. This simplifies the method
and makes sure you're not poisoning the yeast with too much salt.
Now the water and dry ingredients are
together. The only thing missing is oil. You should never add the
oil with the water, or to the dry ingredients. If oil contacts the
dry flour, it will coat the starch granules and keep them from
absorbing water properly. It can cause your bread to develop crumbly
patches. The right way to do it is to put the dry ingredients and
water together, give it a stir until the flour is mostly moistened,
and then add the oil. Your dough, and in turn your bread, will turn
out silky and smooth, instead of grainy.
Now that the ingredients are
together, you'll need to gently blend them, until they come together
into a sticky, shaggy ball. A wooden spoon is a good tool for the
job. Just stir it and mush it together for a bit, until a single
mass is left in the middle of your mixing bowl. This is the
beginnings of the dough. From here, a bit more intense effort than
stirring will be required.
Overall, the goal in mixing is to
keep your yeast alive, and to hydrate all of your flour. Keep those
two objectives in mind and everything will work out okay.


Step 3) Kneading
When it comes to bread, the goal of
kneading is two-fold. For one, you're trying to make sure that all
the ingredients are very evenly dispersed throughout the dough. If
you don't manage to accomplish a good mixing, your bread will turn
out uneven, with lumps of different textures, none of them good!
Secondly, mixing is what makes the dough strong and elastic. The
gluten in wheat flour is a stretch protein. It's what gives bread
its texture. Also, it's what holds in the gasses produced by the
yeast to give the dough rise. The more you press and squish the
dough together, the more the gluten strands connect to one another to
form a complex web.


In order to get a good quality loaf, this web has to be very complex, spreading out in all directions. In normal dough, this doesn't happen on its own. Mixing is only the beginning. Now you have to put some muscle into it! Fold, press, roll, and press the dough some more! Only through a firm kneading of the dough will you get a good quality bread.
 If you're kneading by hand, there's
very little to worry about going wrong. Basically, it's just a
matter of repeatedly folding the dough over itself and pressing it
back together. The only issue that arises is the dough sticking to
the counter. Simply make sure that you keep sprinkling a little
flour on the counter as you work. After the initial working of the
dough, the stickiness should turn to mere tackiness, and it should no
longer stick to the table.
If you're kneading by hand, there's
very little to worry about going wrong. Basically, it's just a
matter of repeatedly folding the dough over itself and pressing it
back together. The only issue that arises is the dough sticking to
the counter. Simply make sure that you keep sprinkling a little
flour on the counter as you work. After the initial working of the
dough, the stickiness should turn to mere tackiness, and it should no
longer stick to the table.
 Remember, when kneading by hand it
takes a while to get the gluten worked enough. You need to keep at
it for at least 10 minutes in most cases. As you knead, you'll see
the dough getting smoother and feel it get more stretchy. After the
first 5 or 6 minutes, you won't notice much more change in the dough,
but keep working anyway. It will continue to get tougher and more
rubbery. This is a sign that the gluten web is getting very strong
and complex.
Remember, when kneading by hand it
takes a while to get the gluten worked enough. You need to keep at
it for at least 10 minutes in most cases. As you knead, you'll see
the dough getting smoother and feel it get more stretchy. After the
first 5 or 6 minutes, you won't notice much more change in the dough,
but keep working anyway. It will continue to get tougher and more
rubbery. This is a sign that the gluten web is getting very strong
and complex.
If you're using a mixer to knead your
dough, there are a couple of issues you need to watch for. The first
is in the initial combining of ingredients. The mixer can take care
of the mixing and kneading in one fluid action. But be careful!
Sometimes pockets of flour will get pressed to the bottom of the
mixer bowl, and won't get incorporated. You need to free it by hand
to coax it into the mass. Shut off the mixer and root at the dry
flour either with your hand or a spoon, and roll the dough in it.
 Another main concern with bowl mixers
is over-kneading. While over-kneading dough is nearly impossible by
hand, a mixer has a great deal of torque, and shows no mercy on
dough. If you leave it in running too long, it will work the gluten
up so tight that the dough will literally be torn into shreds.
Usually around 6-7 minutes is long enough for a bowl mixer to knead
bread. Make sure to keep a close eye on it.
Another main concern with bowl mixers
is over-kneading. While over-kneading dough is nearly impossible by
hand, a mixer has a great deal of torque, and shows no mercy on
dough. If you leave it in running too long, it will work the gluten
up so tight that the dough will literally be torn into shreds.
Usually around 6-7 minutes is long enough for a bowl mixer to knead
bread. Make sure to keep a close eye on it. There are a few tell-tale signs of
when you've kneaded your dough enough. For one, as I mention before,
the dough goes from stretchy to somewhat rubbery. Second, the
surface of the dough will become very smooth. It looses its blotchy,
clumpy appearance, and becomes very silky and uniform. When you
think you've worked it enough, there a couple of tests you can do to
see if you're right. First, poke it slightly, to see if it feels
elastic. If it does, and the dimple presses most of the way back
out, it's a good sign. Next, slowly and very gently tug on a bit of
the dough. If it feels stretchy and doesn't tear, it's getting close
to being finished. If you can then very gently pull on the dough
until it is one thin, translucent sheet (known as the “window
pane”), the dough is perfectly kneaded.
There are a few tell-tale signs of
when you've kneaded your dough enough. For one, as I mention before,
the dough goes from stretchy to somewhat rubbery. Second, the
surface of the dough will become very smooth. It looses its blotchy,
clumpy appearance, and becomes very silky and uniform. When you
think you've worked it enough, there a couple of tests you can do to
see if you're right. First, poke it slightly, to see if it feels
elastic. If it does, and the dimple presses most of the way back
out, it's a good sign. Next, slowly and very gently tug on a bit of
the dough. If it feels stretchy and doesn't tear, it's getting close
to being finished. If you can then very gently pull on the dough
until it is one thin, translucent sheet (known as the “window
pane”), the dough is perfectly kneaded.
If you ever feel wary about your
mixer, feel free to remove the dough and finish kneading it by hand.
Just remember, always pay attention to how the dough feels. Your
sense of touch will tell you everything you need to know about the
dough. Once you develop a good sense of judgement, your dough will
turn out perfect every time.
Step 4) The First Rise
Now that the dough has been
thoroughly kneaded, it's time to give it a rest. So far you've given
the yeast what it needs to make gasses, and a gluten web to hold
them. It's time to let the dough rise.
There are two things happening during
this step. The most obvious is that the gasses from the yeast begins
to permeate the dough and make it grow. Those gasses are being
created by the yeast's fermentation. Fermentation contributes
largely to the overall flavour of your bread. It's during
fermentation that the yeast breaks down some of the flour's starch to
produce CO2
and alcohol. The starch breaks down into simpler sugars, making the
bread sweeter and more flavourful (and the alcohol doesn't hurt
either!).
The other important process that
happens during the rise is the relaxing of the gluten. After all the
kneading in the previous step, the gluten has become tough a rubbery.
While this is important for connecting all of the gluten strands, if
the gluten were to stay tough, your finished bread would be very
tough. Fortunately, when gluten is left to rest, the tension in the
strands release and they become soft again.
Most of the first rise step is simply
waiting for the dough to rise on its own. The important thing to
remember now, however, is that the dough will dry out if it is simply
left to sit on a counter. Also, leaving it exposed to the air will
cause it to cool off very quickly. You have to give the dough the
right kind of environment for rising. Usually I use a bowl or some
other container, and wrap the top with plastic wrap. This makes a
good moisture barrier for the dough, and helps to hold in the
warmth. Any container will do, but I don't suggest using a tight
sealing lid. Gasses can build up and pop it off. Plastic wrap will
flex enough to hold the gasses.
Another important factor to keep in
mind is ambient temperature. If your kitchen is already fairly warm
from cooking etc, the dough should rise at a good pace on your
counter. But your kitchen will rarely be warm enough on its own. In
commercial bakeries they use a special heated cabinet called a
proofer to rise the dough. You can set up a similar system in your
kitchen. The microwave can be used for this. Heat a mug of water in
your microwave for a couple of minutes, and immediately put the dough
in afterwards and shut the door. The heat from the steam will stay
trapped for a while. You also don't have to worry about cool drafts
getting at the dough. Another method is to preheat your oven to a
very low temperature (around 150 F). Start preheating the oven when
you begin mixing the dough, and shut it off as soon as it has
preheated fully. By the time the dough is ready to rise, the oven
will have cooled to a good temperature. Be careful using this
method, though. If the oven is too hot when the dough goes in, it
may kill the yeast, or even start cooking the dough!
For most doughs, they need to rise
until doubled in volume. This usually takes about an hour or two.
Be patient! You don't want to cut your rise short and lose out on a
better flavour and texture. Wait at least an hour before checking up
on it. At the other extreme, however, you don't want to let it rise
too much. It takes a long time, but it is possible to over-rise your
dough. If this happens, the gasses will have stretched the dough out
so much that it will start to collapse on itself. If this happens,
you'll have to squash the dough back together and let it rise again.
Otherwise the finished bread may have strange texture.
When the rise is finished, the gluten
needs to be fairly relaxed as well. In the following steps the dough
will be worked again, and if the gluten is still tough after the
first rise, it will carry over. The dough won't rest long enough
afterwards for the gluten to relax enough, and your bread will be
tough. But testing it is simple enough! Poke the dough. If it
holds the dimple you've made, or even collapses into it, the gluten
is plenty relaxed.


Step 5) Dividing
Now you have a mass of risen dough.
It's soft, jiggly, and smells wonderful! But it's not much use to
anyone as is. If you tried to bake it now, you'd end up with a big
loaf of stringy dough with giant holes running through it. On top of
that, it would most likely collapse on itself in mid bake!
 This is why you need to cut the dough
into smaller pieces that can be formed into buns. The reason that
this step is referred to as dividing is because the goal is to cut
all of the pieces into uniform size. The closer to the same size you
get all your buns the more attractive your finished bread will be.
This is why you need to cut the dough
into smaller pieces that can be formed into buns. The reason that
this step is referred to as dividing is because the goal is to cut
all of the pieces into uniform size. The closer to the same size you
get all your buns the more attractive your finished bread will be. Dividing can be accomplished in three
ways. The first is the simplest and easiest, but requires a scale.
Weighing the dough guarantees that every bun will be the same size.
It's also the easiest way for a recipe to tell you how big to make
them. It's simply a matter of cutting off a hunk of dough, throwing
it on the scale, and adjusting its weight to the right amount. This
is my preferred method. The second method is to take the whole of
the dough and try to cut it into two equal halves. Then cut each of
those pieces in half, and so on. Keep going until you've gotten the
number of buns you wanted. This can be a very quick process once
you've practised at it. The best part is that if some buns end up
looking larger than others, you can simply cut a bit off the large
ones and attach it the the small ones. The third method is straight
judgement. Just go by eye, cutting off pieces of dough that you
think are the right size. This is tricky unless you're very familiar
with the dough you're making. But again, you can adjust the size of
your buns once you've cut them all.
Dividing can be accomplished in three
ways. The first is the simplest and easiest, but requires a scale.
Weighing the dough guarantees that every bun will be the same size.
It's also the easiest way for a recipe to tell you how big to make
them. It's simply a matter of cutting off a hunk of dough, throwing
it on the scale, and adjusting its weight to the right amount. This
is my preferred method. The second method is to take the whole of
the dough and try to cut it into two equal halves. Then cut each of
those pieces in half, and so on. Keep going until you've gotten the
number of buns you wanted. This can be a very quick process once
you've practised at it. The best part is that if some buns end up
looking larger than others, you can simply cut a bit off the large
ones and attach it the the small ones. The third method is straight
judgement. Just go by eye, cutting off pieces of dough that you
think are the right size. This is tricky unless you're very familiar
with the dough you're making. But again, you can adjust the size of
your buns once you've cut them all.
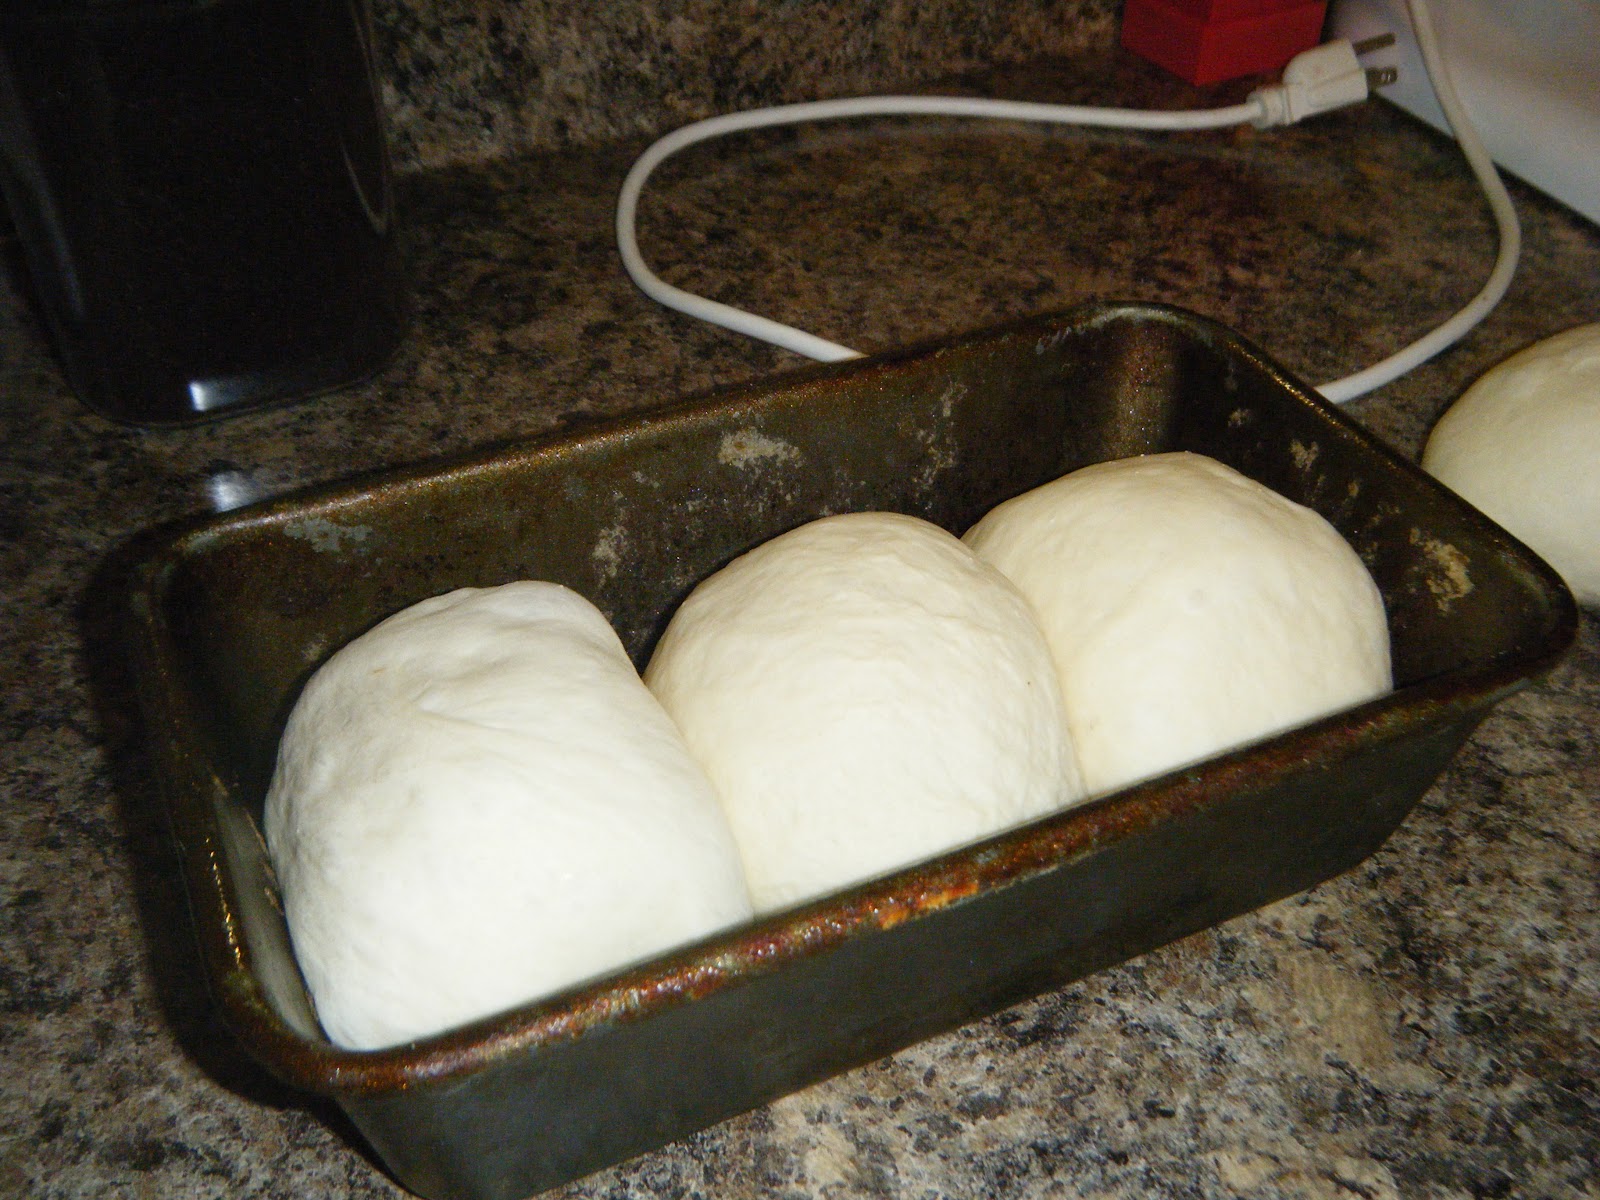
Step 6) Shaping and Panning

You've finished dividing the dough
into smaller globs. It's still jiggly and amorphous. Again, trying
to bake them now would give you a pile of saggy flatbreads with the
texture of a cleaning sponge. This is why shaping is so important.
You need to give the bread form and structure, so that when it rises
again it holds itself together. The counterpart to shaping is
panning. Panning simply refers to the process of either putting the
dough into bread pans, or laying them out on a sheet pan.


 There are only a few simple rules you
need to follow to shape bread. The most important thing to remember
is that the surface of a finished bun has to be smooth and tight.
This is done either by rolling the dough on the counter, or by
pulling it by hand until the surface is taut. This is a little
difficult to explain in words. My posts will have lots of pictures
of the shaping process, and should help explain things much better.
The other rule is to make sure that you degas your buns properly.
Through the rising process the dough built up a lot of gasses. While
this is a good thing, it ends up having too much gas for the finished
product. Gentle pressing through the shaping process is all it takes
to properly degas. Always remember to pay attention to the feel of
the buns as you go. If you feel a large bubble in the dough, press
it out. The only other point on shaping that needs mentioning is
that you should aim to make your buns uniform. Having them all the
same size and shape is not only more attractive, but it also makes
sure they all bake evenly. A thinner bun will be finished sooner
than a thicker bun, for example.
There are only a few simple rules you
need to follow to shape bread. The most important thing to remember
is that the surface of a finished bun has to be smooth and tight.
This is done either by rolling the dough on the counter, or by
pulling it by hand until the surface is taut. This is a little
difficult to explain in words. My posts will have lots of pictures
of the shaping process, and should help explain things much better.
The other rule is to make sure that you degas your buns properly.
Through the rising process the dough built up a lot of gasses. While
this is a good thing, it ends up having too much gas for the finished
product. Gentle pressing through the shaping process is all it takes
to properly degas. Always remember to pay attention to the feel of
the buns as you go. If you feel a large bubble in the dough, press
it out. The only other point on shaping that needs mentioning is
that you should aim to make your buns uniform. Having them all the
same size and shape is not only more attractive, but it also makes
sure they all bake evenly. A thinner bun will be finished sooner
than a thicker bun, for example. 
 Once you've shaped your buns, you
need to decide what to do with them. There are a few general rules
you can follow. For any large sandwich loaves, you should always use
bread pans. Because they're so large, they would collapse a bit as
they bake outside of a pan. Also, the pan acts as a shield against
the oven's heat. The pan allows the crust of the bread to cook
slowly, so it doesn't end up very dark by the time the centre of the
bread has finished baking. Small singular buns, like bread rolls,
kaisers, etc, are best baked free standing on a cookie sheet. With
these you want the whole surface evenly browned. Plus, because
they're small they bake quickly. Baguettes are usually done free
standing, to allow them to develop a thick crust. However, you can
buy very nice baguette pans with perforated bottoms, that still give
you a nice crusty finish. Multi-bun rolls, like pull-apart buns and
butterflake rolls, are done in a muffin tin. The tin holds the buns
together and gives them a more attractive shape.
Once you've shaped your buns, you
need to decide what to do with them. There are a few general rules
you can follow. For any large sandwich loaves, you should always use
bread pans. Because they're so large, they would collapse a bit as
they bake outside of a pan. Also, the pan acts as a shield against
the oven's heat. The pan allows the crust of the bread to cook
slowly, so it doesn't end up very dark by the time the centre of the
bread has finished baking. Small singular buns, like bread rolls,
kaisers, etc, are best baked free standing on a cookie sheet. With
these you want the whole surface evenly browned. Plus, because
they're small they bake quickly. Baguettes are usually done free
standing, to allow them to develop a thick crust. However, you can
buy very nice baguette pans with perforated bottoms, that still give
you a nice crusty finish. Multi-bun rolls, like pull-apart buns and
butterflake rolls, are done in a muffin tin. The tin holds the buns
together and gives them a more attractive shape.
Remember the following pointers:
- If a dough is very sweet, it browns very quickly. Baking these in pans shields them from browning too quickly.
- If a loaf is large, it needs a bread pan for support.
- If a loaf is large, but has no sugar (mainly sourdoughs), it can be baked in a round ball at high heat, because there's little worry about the crust getting dark too quickly.
- If you are making small buns or thin loaves, they can support themselves. Also they need to be fully exposed to the air to brown properly
- Any loaves or rolls made of multiple buns need the support of a bread pan, muffin tin, etc, in order to hold the buns together.
- Any rolls or loaves that are braided are able to support themselves. Plus, if they're baked in a bread pan they lose the braid pattern on the sides.
I'll go more in-depth with shaping
and panning with each recipe I post.

So you've decided on a shape, formed
the buns, and panned them. The hard part is truly over now. There
are only two steps left between you and delicious homemade bread.
You now have several pans of shapely buns, but they're still not
ready for the oven. If you decided to put these straight into the
oven, you'll end up with dense bricks of bread that are only useful
as doorstops and concealed weapons.
During the shaping process, you
pressed out all of the large gas bubbles in the dough, leaving only
the very tiny bubbles that permeate the entire dough. There's plenty
of gas still in the dough, but not enough to make a light and fluffy
bread. Those little bubbles now need to grow larger.
I know what you're thinking. Why did
you have to knock out so much gas if you now need to let the dough
make more? The issue is that the gas was in the form of large
bubbles. Those bubbles would have left gaping holes through your
bread, and made for a coarse, stringy texture. By degassing the
dough and letting it rise again, you ensure that the finished bread
will have even bubbling throughout the crumb. It is this process
that gives bread it's desirable smooth and fluffy texture. (As a
side note, I figured I'd mention that the outer surface of baked
bread is called the crust, and the soft inner is called the crumb).

Keep a close eye on the dough here.
The yeast is producing gas at full force by now, so the dough rises a
lot faster than it did during the first rise. You should also be
preheating your oven while the second rise is happening, to make sure
that you can start baking it the instant it reaches it's proper size.


Remember, the 75% growth is only a
guideline. Often different types of dough need to rise to different
sizes. Check the individual recipes for pointers on the second rise.
Step 8) Baking
It's time! The moment you've been
waiting for! After several hours of patience and care, it's time for
the fleeting few minutes of baking. Bread isn't like other foods.
With most things that go into the oven, you want to cook it slowly on
low heat, to ensure that it becomes tender and juicy. In order for
bread to come out moist and tender, it needs to be baked at a high
temperature for a very short amount of time.
While different types of buns and
rolls need to be baked at different temperatures for different
lengths of time, the general rule is that thinner loaves need higher
temperatures, and shorter baking times. Baguettes, for example, are
long and very thin. They are usually baked for only 10-15 minutes at
450 F. The idea is that at a high temperature, the crust forms very
quickly, which in turn locks in the steam inside the loaf, and cooks
the crumb. This means that very little steam is lost, making the
finished bread very moist and tender.
The biggest mistake that can occur
during baking isn't so much the wrong temperature, but the wrong
length of time. If you take the bread out too soon, the middle will
still be dough. This is disgusting! If you leave it in too long,
you'll both burn the crust, and dry out the crumb. Also disgusting!
Firstly you need to follow the recipe, but secondly, you have to know
how to judge if the bread is done. Your first indication is the
colour of the crust. The crust should range from light golden to
yellowish-brown. If you see spots beginning to turn a deep brown,
it's getting close to the burning point. If you don't think the
bread has finished baking at this point, either open the oven door to
vent it and turn down the temperature, or cover the loaf with tin
foil. The crust can sometimes be deceiving, so you need to perform
another check as well. By picking up the loaf and tapping its
bottom, you can tell if the bread is baked. Simply thump it a couple
of times and listen to the sound it makes. It should be a hollow
resonance through the loaf, that makes it sound empty inside. Raw
dough won't make this sound, so if you hear a clear hollow sound, the
bread is done. This is pretty well the best indicator.
Beyond these pointers, the recipe of
individual breads will give you good advice on visual cues for the
baking process. Just remember, always set a timer! If you forget
about your bread, you'll most likely turn a couple of hours of work
into a few lumps of charcoal!


Step 9) Cooling
At last! From the oven emerges a
steaming, golden loaf of perfectly baked bread. The aroma alone is
driving you crazy! All you want to do is slice off a piece, slather
it with butter, and chow down. But whatever you do, DON'T CUT IT
YET! Just a couple of minutes after slicing that piping hot bread,
the rest of it will collapse into a dense heap of goo.
Bread needs to be cooled after it's
finished baking. For the first 20 minutes after it comes out of the
oven, the crumb is still gelatinous, almost liquid. Steam is still
billowing around inside, gently pushing its way out thorough tiny
holes in the crust. It takes those a few minutes for the remaining
steam to turn back into water, and absorb into the crumb. Then it
takes a few minutes longer for the crumb to cool enough to fully
solidify, or 'set up.' Also, if you cut it right away, all that
steam I mentioned is going to escape. With no crust to hold it in,
the steam will quickly disperse from the cut area. Most of that
steam would have stayed in the crumb and made the bread moist. Now
the rest of the loaf is going to be much drier than it could have
been. How very sad . . . .
Now that you know better than to cut
it right away, you have to go through the whole process of cooling.
The important thing to remember is that bread needs air circulation
over its entire surface while it's cooling. If the bread is in
contact with its pans, the counter, or anything else, the crust will
become soggy on the contact points. For this reason it is important
that you remove your bread from its pans immediately. Once they've
been removed, you'll need to put them somewhere where they'll have
minimal contact with anything. This is where a wire cooling rack
comes in handy. Cooling racks come in many sizes. They're made up
of a series of metal wires attached to a frame that sits on legs an
inch or so above the counter. Place your bread on a cooling rack,
and make sure that the individual loaves/rolls aren't touching one
another. All of the excess steam coming out of the bread will
evaporate into the air, leaving it nice and crusty. If you don't
have any cooling racks, you can use a dish towel or other such cloth.
Spread the cloth out on the counter and place the breads on them.
The cloth will absorb most of the steam. Just remember that you'll
need to turn the bread a few times during cooling to keep the crust
from getting damp.
Step 10) Storing Bread
This is straightforward. You've made
a delicious bread, with a good crust and soft crumb, but you haven't
managed to eat the entirety of your batch. You'll want to save them
for later, and leaving the bread on the counter, open to the air,
will cause it to get stale overnight.
The best way to store bread is
wrapped in plastic. Grocery stores carry clear plastic bags, usually
called poly-bags, or storage bags. They come labelled based on the
maximum weight they can hold. For most breads these bags do well to
hold them. For my sandwich loaves I always use '10 lb' poly-bags.
It's important that the bag you use is large enough to both hold the
bread, and still have enough slack at the opening to tie or clip it.
The bread will need to have 'not quite airtight' seal to stay fresh.
When storing bread, make sure it's
fully cooled first. If there is any warmth left inside the bread,
steam will form in the bag. This will make the crust soggy, and
allow mold to grow very quickly. Your bread will go bad in a day! A
large sandwich loaf of bread takes about an hour to cool down
completely. Baguettes and small buns usually only take 20-30
minutes.
Remember, never seal bread in an
airtight container. Absolutely no air flow makes an ideal
environment for mold to grow, and it will grow very quickly. A
simple overhand knot, or a bread clip, is all you need. Even loosely
wrapping bread in saran wrap works well enough for a couple of days.
If you want to keep bread long-term,
it can be frozen. Breads that contain oil, butter, etc, freeze very
well for long periods, and defrost at room temperature very quickly.
Sourdoughs and other breads with no fats added don't freeze quite as
well. They have a tendency to stale during freezing. Bread can also
be refrigerated, but at fridge temperatures they get stale in just a
few hours. However, if you plan on heating or toasting your bread
before serving it, it's fine to keep it in the fridge. Heating bread
temporarily reverses the staling.

And there you have it! The ten steps
to making bread. I know it seems complicated and overwhelming at
first, but all it takes is a little practise. The way I see it,
ingredients for making bread are cheap and plentiful. If you do mess
it up the first few times, you're out a couple of dollars and a few
hours. No big loss! The right way to tackle bread will come with
experience. Just focus on your sense of touch, and really try to
feel what's happening to the dough as you're going. Have faith!
If you have any questions, comments,
hate mail, etc, I'm going to set up an FAQ for you. I'll try to
answer as many questions as I can, to help you with this whole
process. Thanks for reading! Plenty more to come!
No comments:
Post a Comment